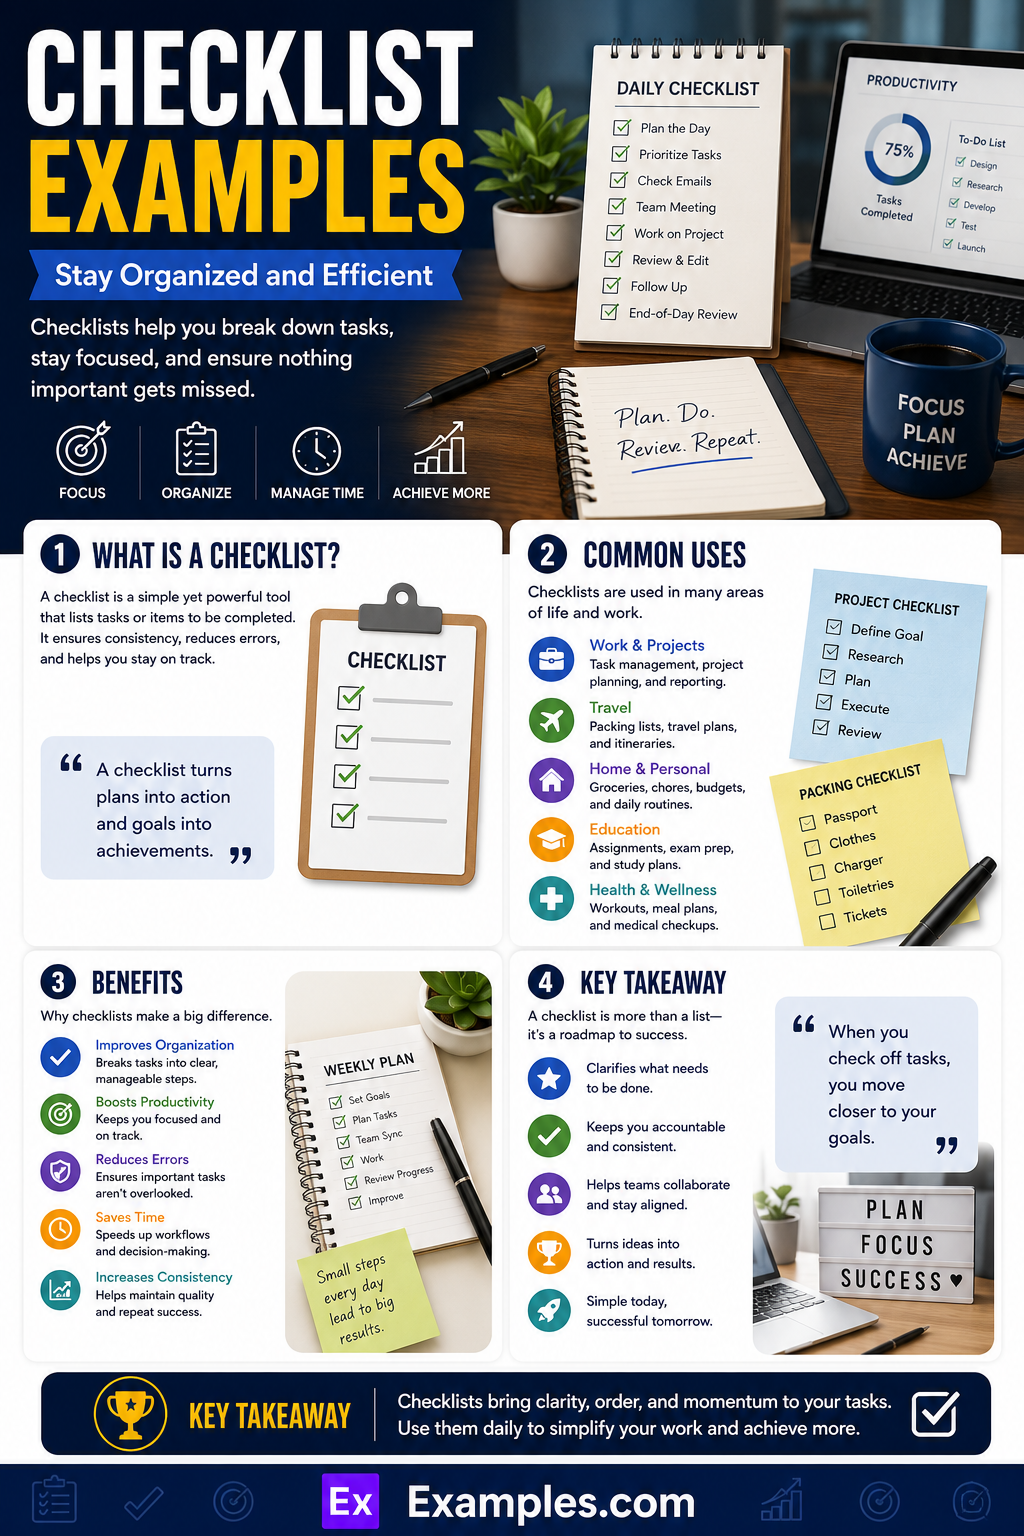
A checklist is a structured list used to organize tasks, activities, or procedures. It improves productivity, accuracy, and workflow management. Checklists help ensure that important steps are not overlooked.
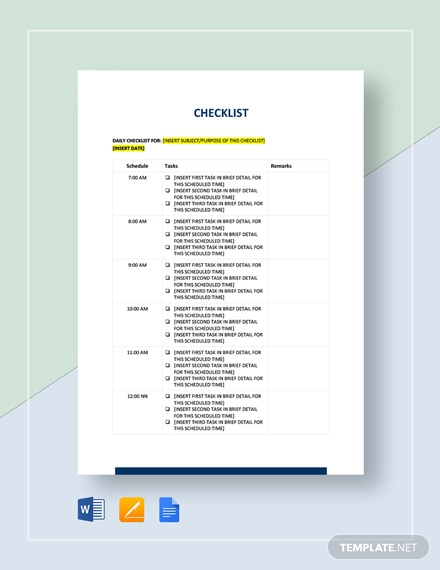
Checklist Sample Template
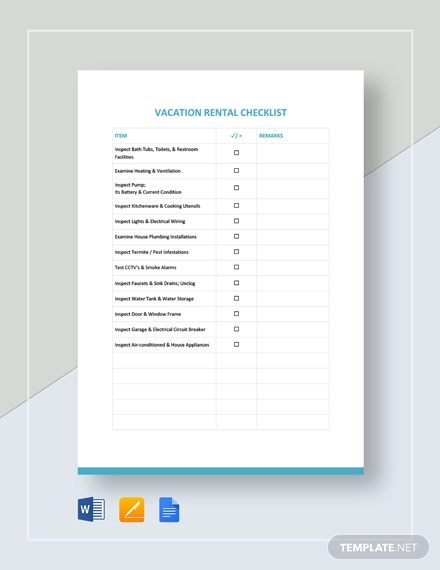
Vacation Rental Checklist Example
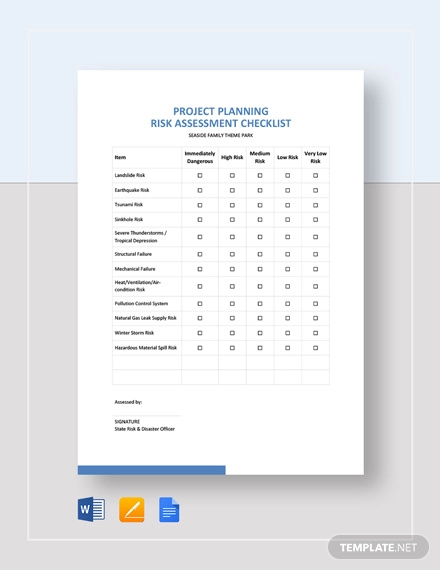
Project Planning Risk Assessment Checklist
Management Checklist
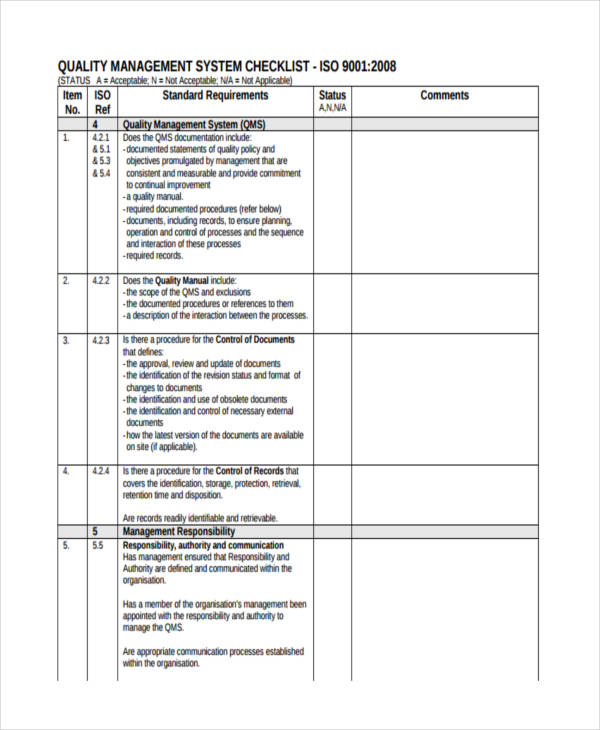
Quality Management
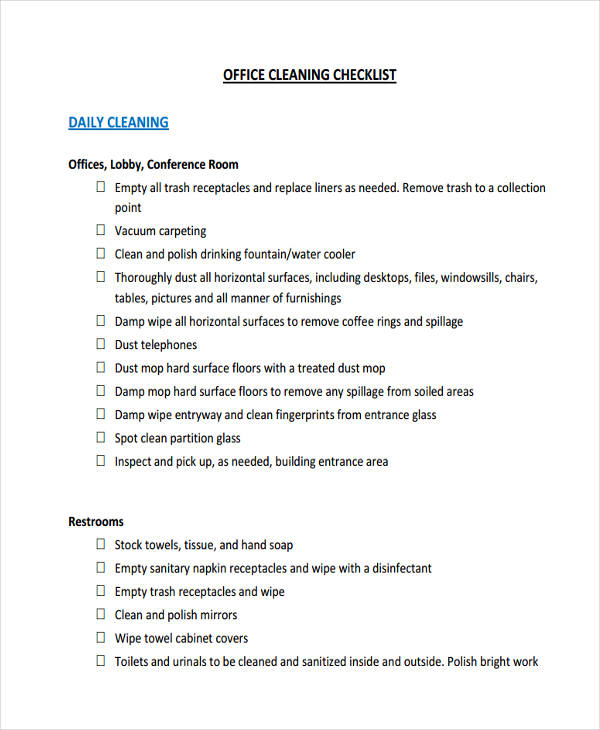
Checklists can be useful ways to organize your daily routine work. Whether you live with your family or alone, you cannot go out on a day without completing your daily cleaning work. And having a checklist for your cleaning task will save you from your time, and energy. So, if you are looking for a cleaning checklist Examples, this templates will help you out in creating a checklist of your own.
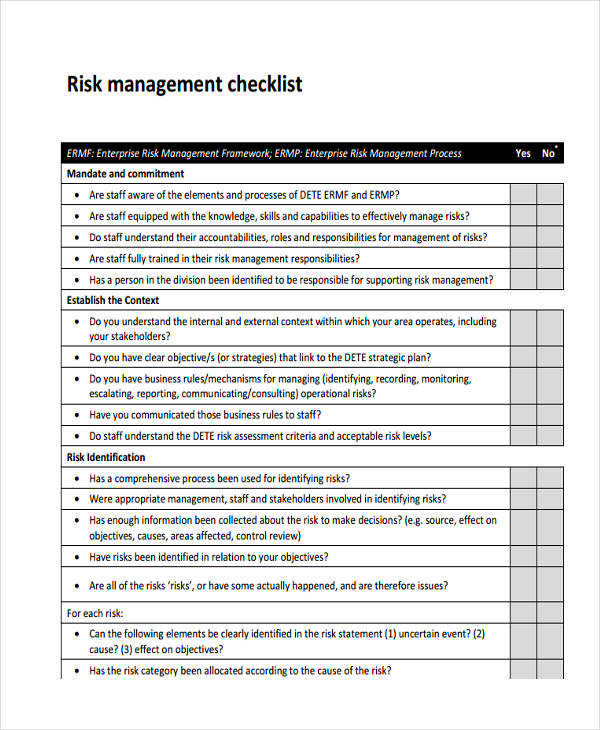
Risk Management
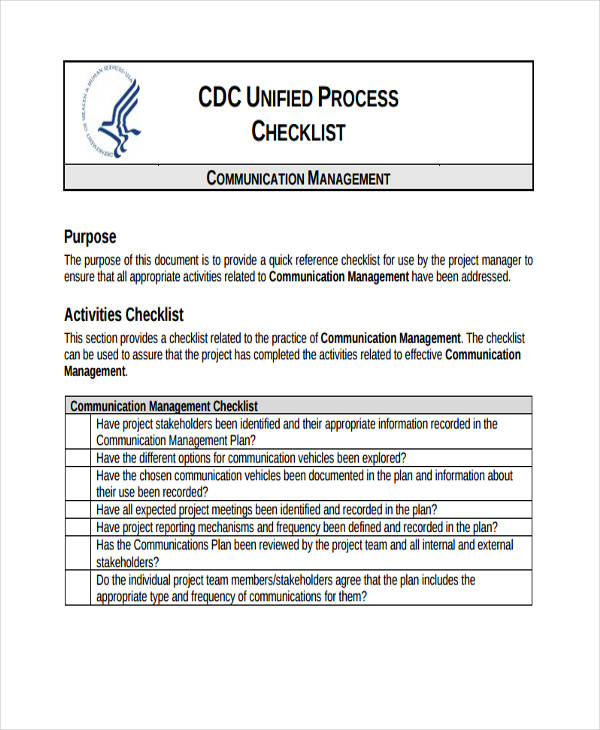
Communication Management
Cleaning Checklist
Office Checklist
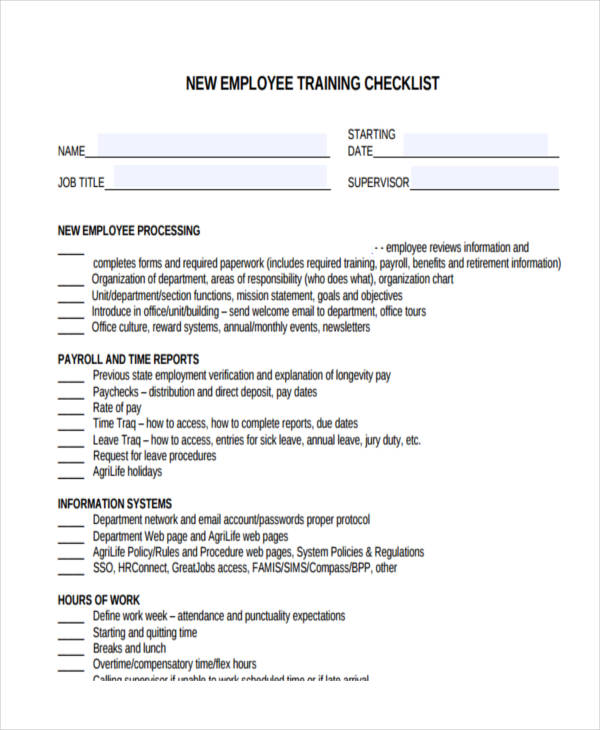
Training Checklist
Employee Training
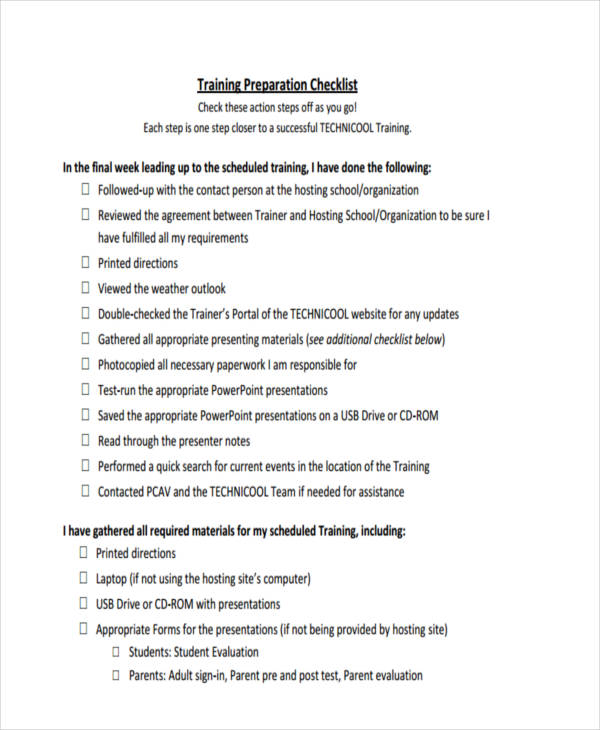
Preparation Checklist
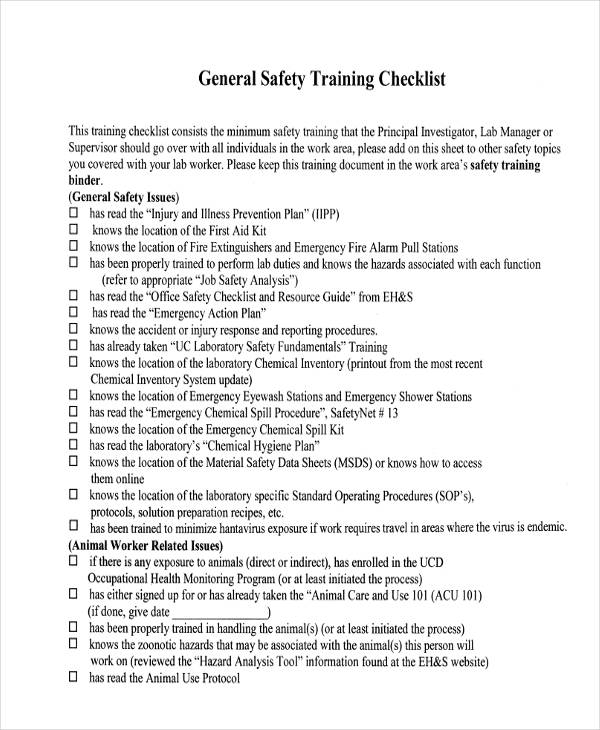
Safety Training
What Is a Checklist?
It is human’s nature to make mistakes and forget about things. There are always times when we’re thinking about something we should do and then seconds after forgetting what we were thinking about.
To help us in times like those, a use of a maintenance checklist helps. This list contains all the necessary tasks or things that we need to check or inspect in completing a project plan or a job plan. Checklists can be used as an aid for any type of field such us building surveys and medical treatments. Creating a printable checklist helps ensure nothing is missed.
How to Create a Checklist
There are no standards in making or creating a checklist in excel. At home, when you need to do some groceries or to finish some chores or to run errands, you may have written lists, not knowing, these lists are already your checklists.
To create a checklist, you have to prepare a pen and a paper. It doesn’t necessarily need to be printed, it can also be just a written list. What is important is the content of that list which presents or show all the necessary things that need statement to be checked and needs to be done.
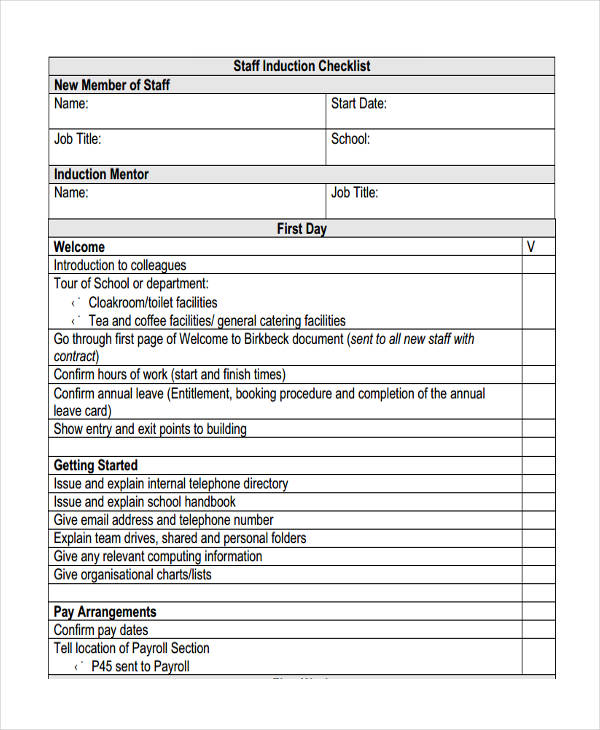
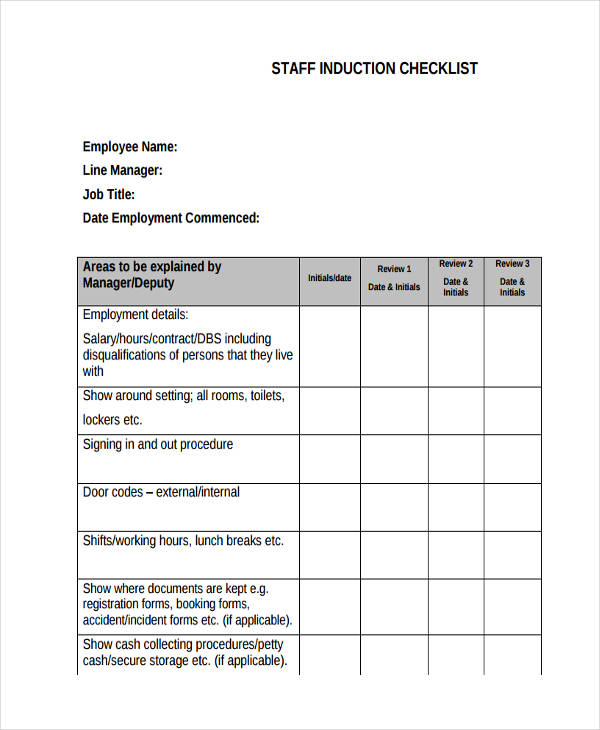
Induction Checklist
Staff Induction
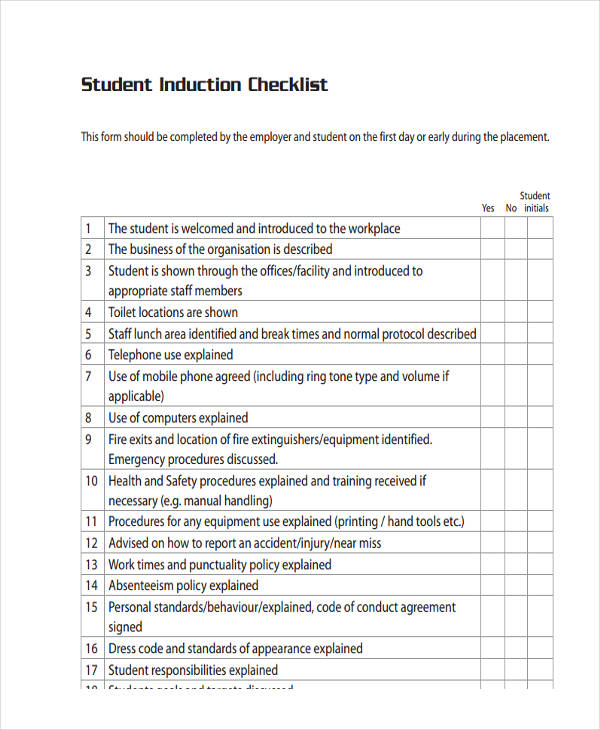
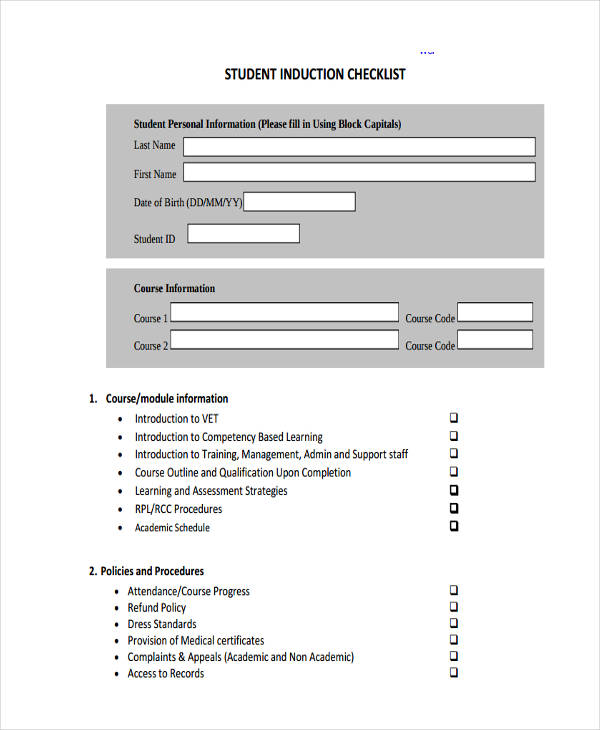
Student Induction
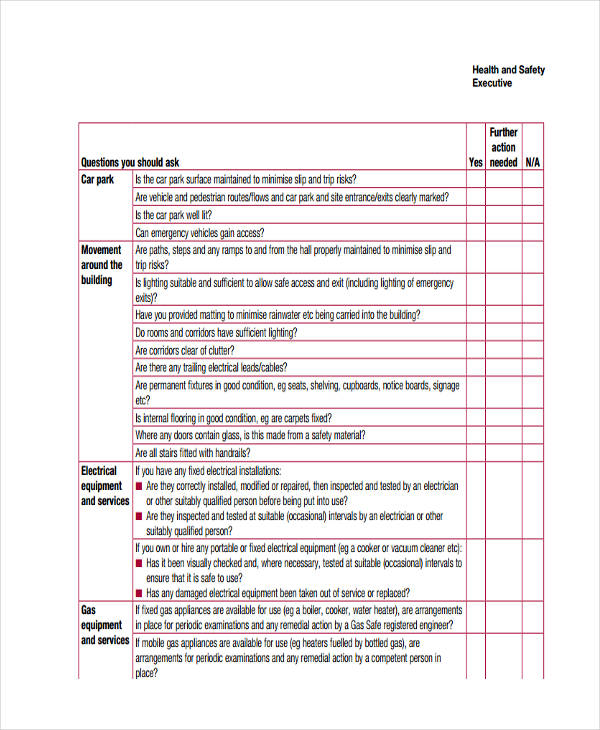
Health and Safety Induction
Sales Checklist
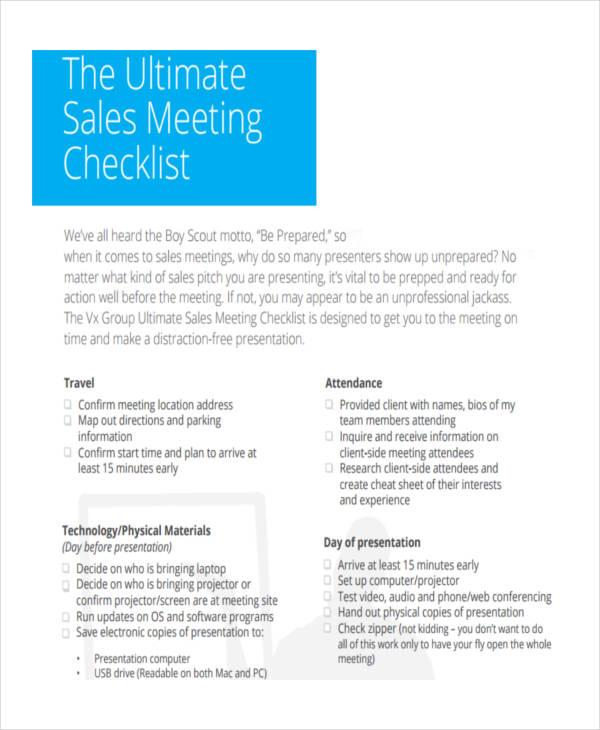
Sales Meeting
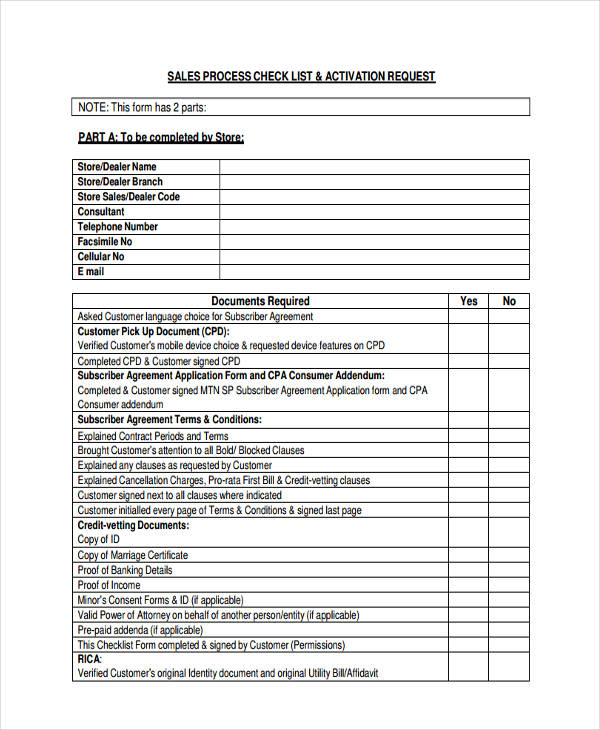
Sales Process
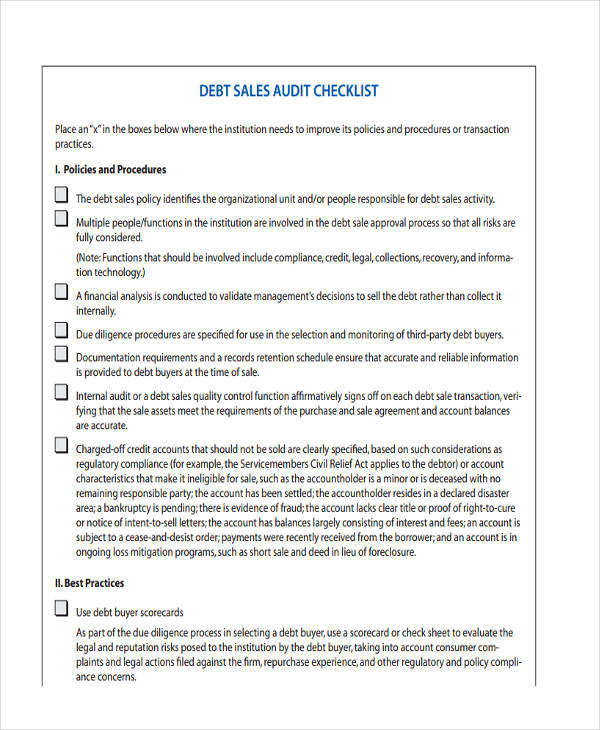
Sales Audit Checklist
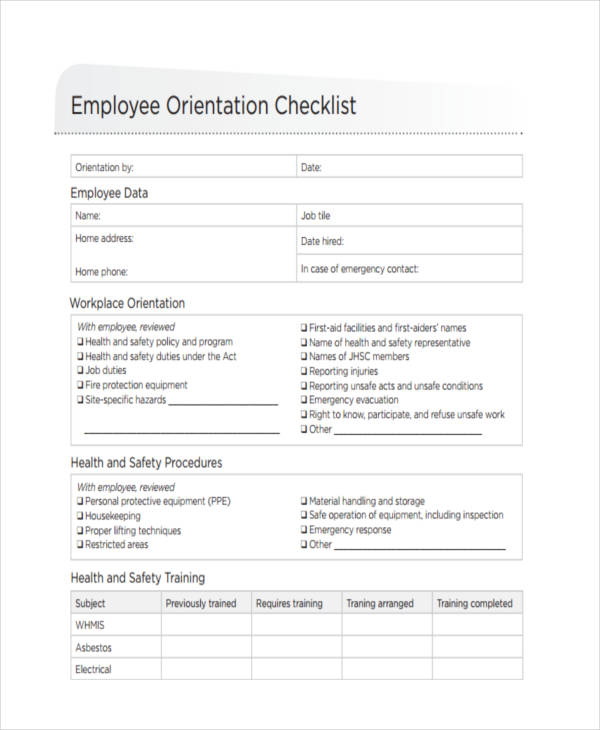
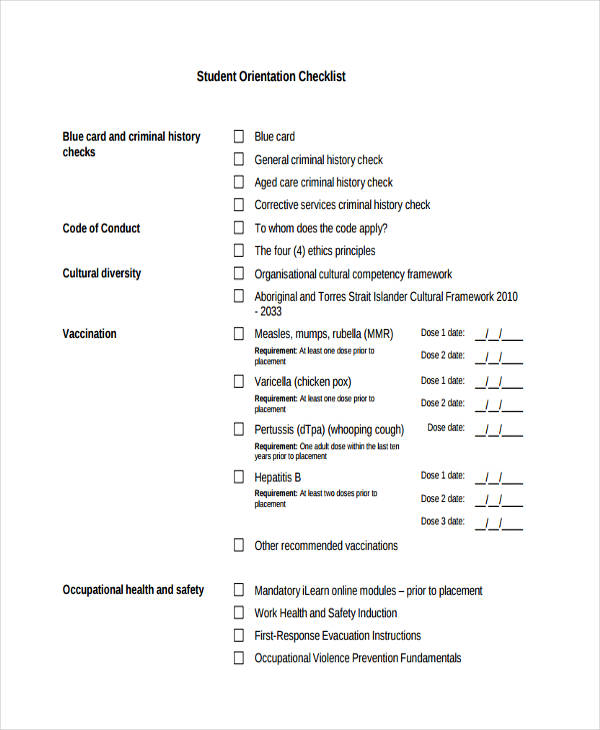
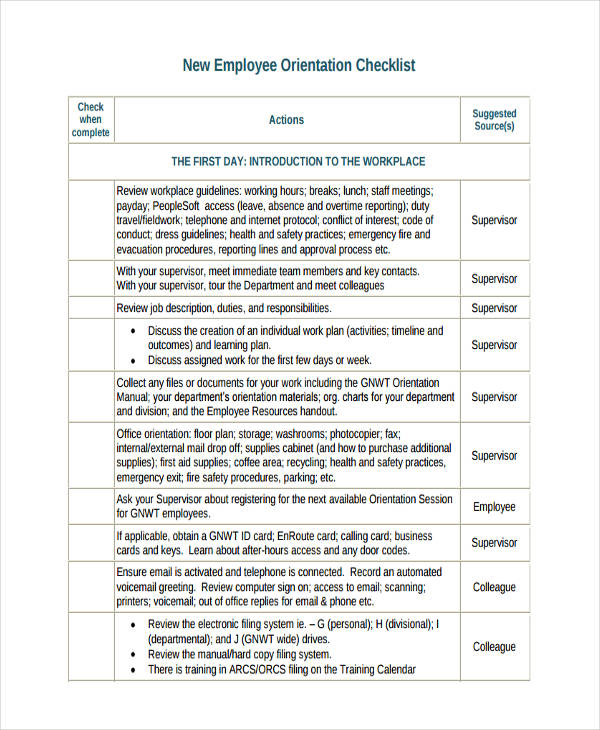
Orientation Checklist
Work Orientation
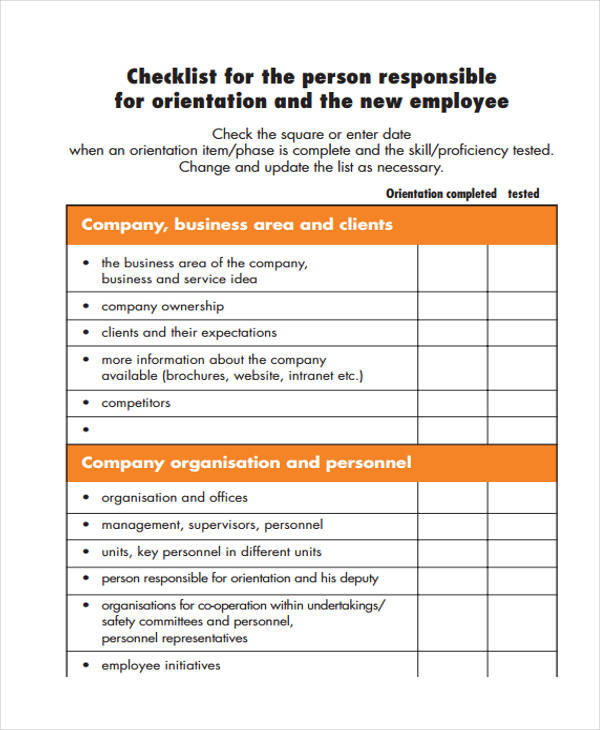
Employee Orientation
Student Orientation
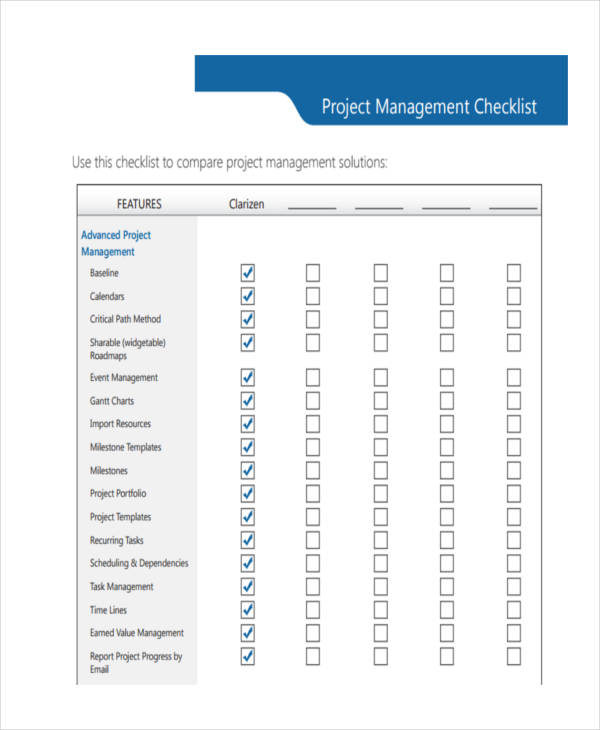
Project Checklist
Project Management
Checklist: How to Use and Ways to Avoid Mistakes
How To
Using a checklist is simple. Checklists are designed in a way that it is easy for anyone, adult or a child, to use. Checklists are basically just lists that are organized according to groups and in which task it is for.
The first thing that comes to mind when talking about a checklist is that the list would have that small box before each line item where a check mark would be written as a symbol that the task is finished; which is true. So how can one prevent from making mistakes in making an audit checklist?
Ways to Avoid Mistakes
Nothing is perfect in this world but that doesn’t mean that nothing can be improved. In making a checklist, it is our smart goal to make it perfect. Although it can’t always be perfect, there are ways to prevent making a mistake when making the list. Here are a few points to remember in order to avoid those mistakes:
- Make sure items are clear and concise
The content of the list is the most important element of a checklist. All items must be understandable and must be clear as to what it is asking for. - Categorize items
For a short project checklist, it doesn’t need to be grouped but for longer checklist, it needs to be. Long lists needs to be organized and grouped into parts to be able to quickly identify where you are on the checklist - Items must be applicable
Items that can’t be executed are irrelevant. Make sure all items can be take into action to meet the expected result - Never skip an item
Items should not be skipped. The tendency will be the skipped item would be marked as finished even if it’s not yet done.
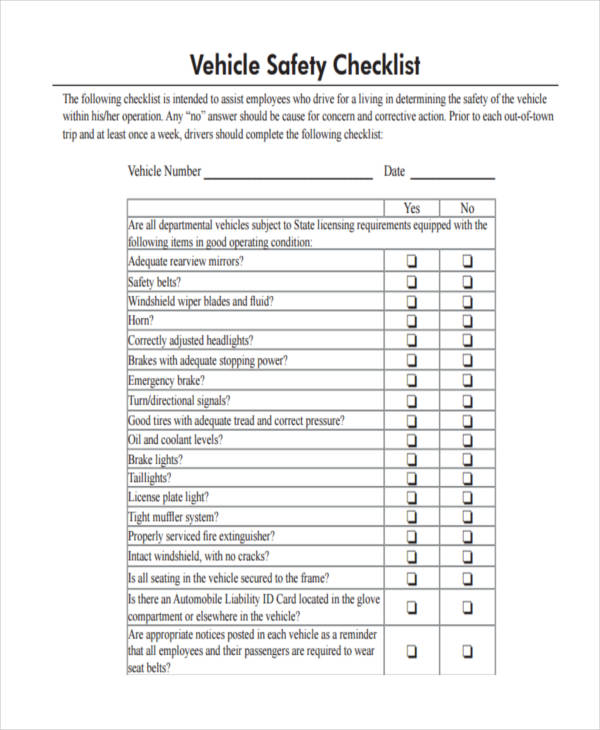
Vehicle Checklist
Vehicle Safety Checklist
Vehicle Maintenance
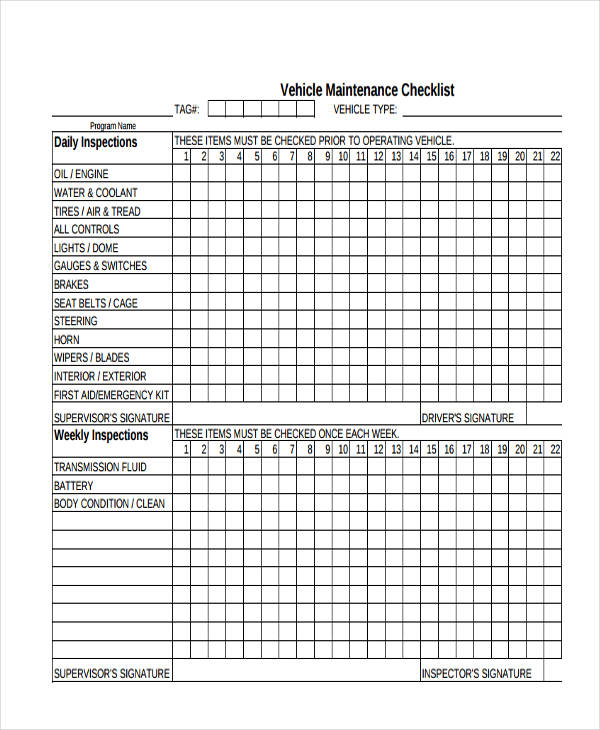
Daily Vehicle Checklist

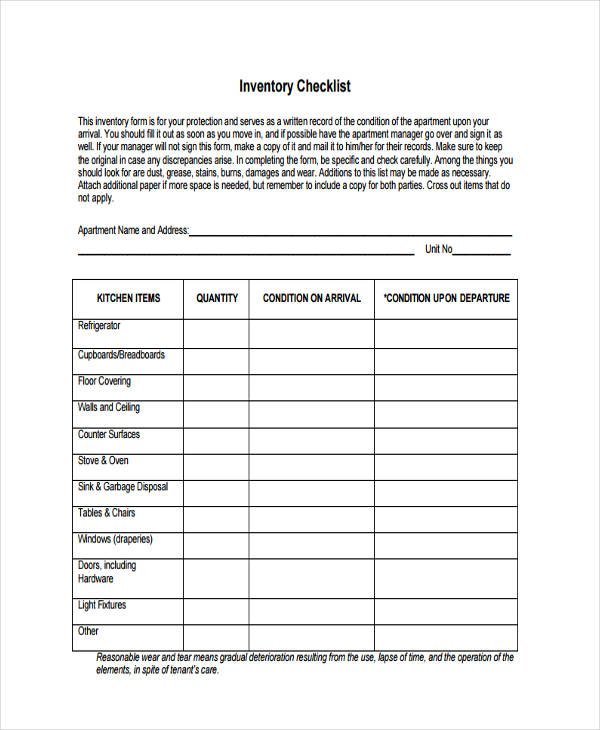
Blank Checklist
Blank Inventory Checklist
Employee Checklist
Employee Onboarding
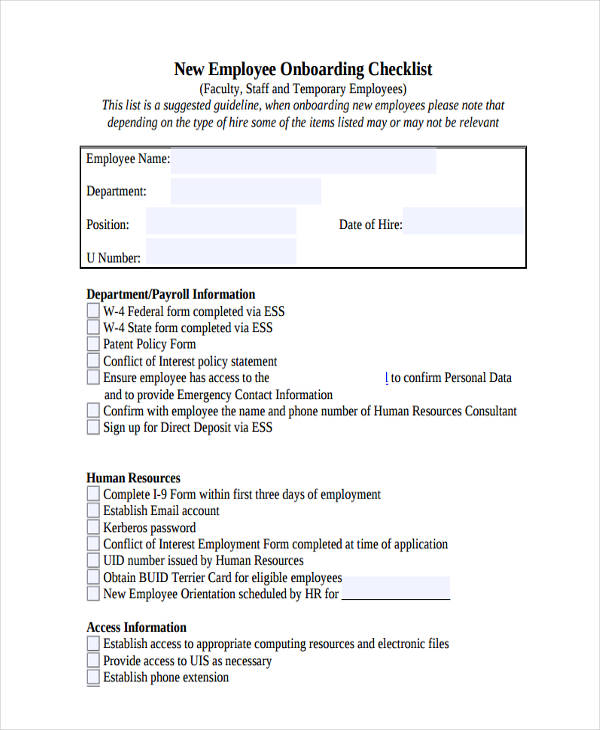
Free Employee Orientation
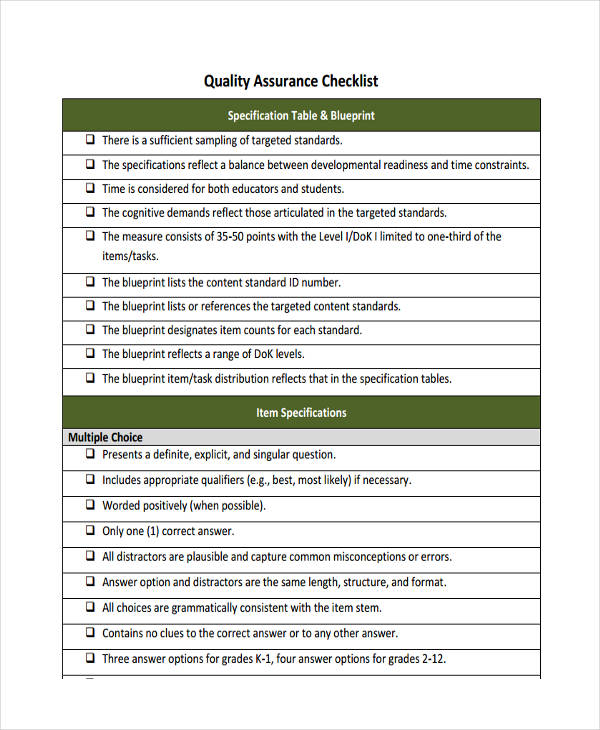
Quality Checklist
Quality Management Sample
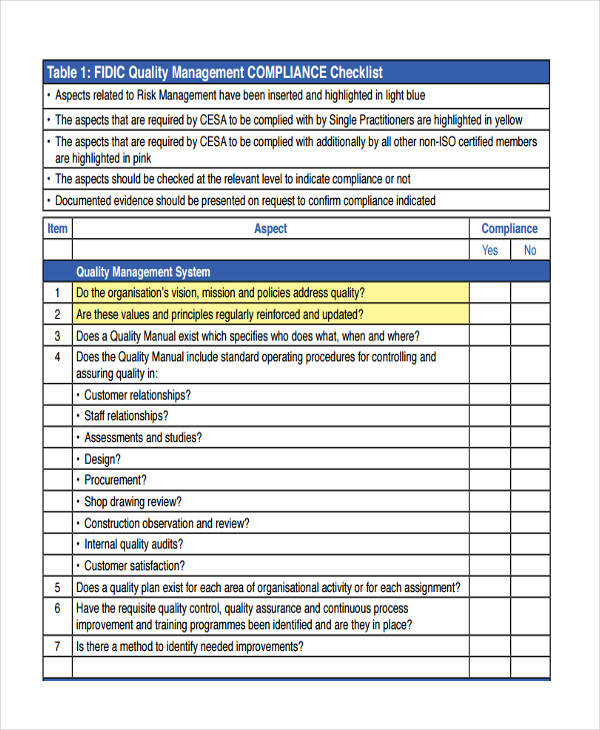
Quality Assurance
Benefits in Using a Checklist
For a person who always tend to forget what he or she would be doing, jobs that covers more than five tasks would be challenging. A lot of employees multitask because of the amount of tasks they have that’s impossible to finish within a daily schedule.
By using a checklist, tasks and other priorities would be finished throughout the day. Checklist helps in managing a person’s task as well as his time in finishing those tasks. It reminds a person what he should be doing and it would help verify that a task has been accomplished.
Disadvantage of a Checklist
There will always be two sides in a coin. When there are advantages, there will also be a disadvantage. With checklist in word helping remind a person of the things he has to do as an advantage, the disadvantage would be the pressure that the person would feel.
Pressure can mostly affect a person’s productivity, either negative or positive, we can’t really tell.
Checklists are also not perfect. There will always be gaps if not improved. Making a cleaning checklist is also not a fun task, specially when it covers a long list.
Despite those positive and negative effects, blank checklists are proven to be helpful in a lot of areas.
Induction Checklist
Staff Checklist
Student Checklist
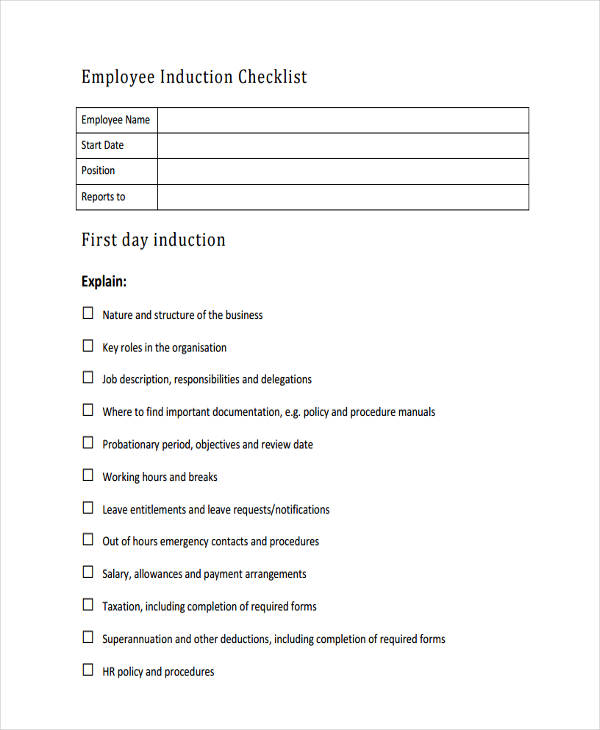
Employee Induction
Audit Checklist
Internal Audit

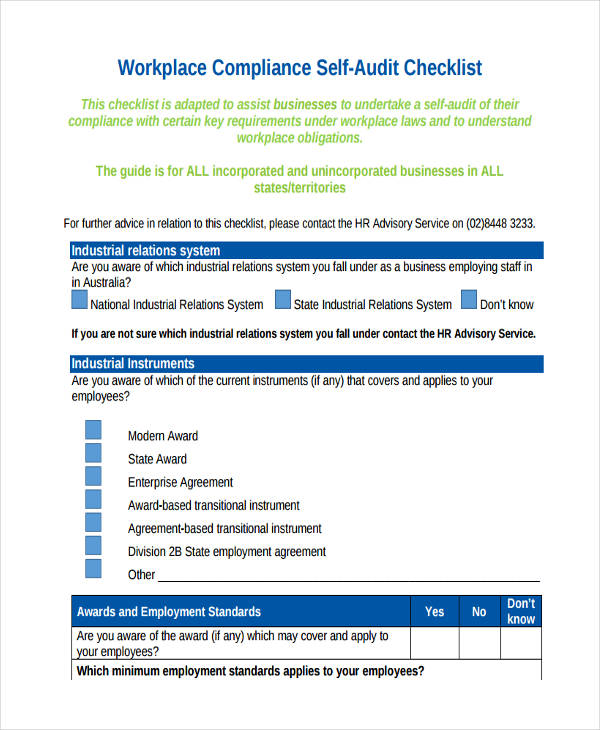
Self Audit Checklist
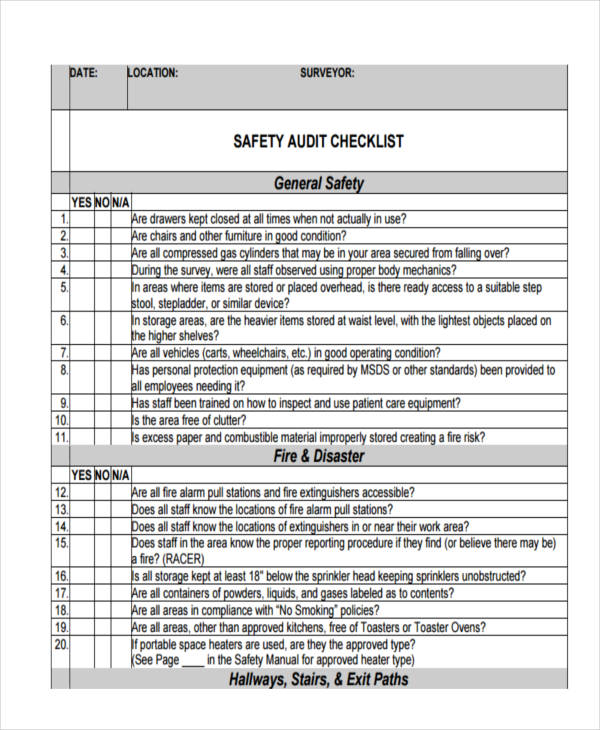
Safety Audit
Marketing Checklist
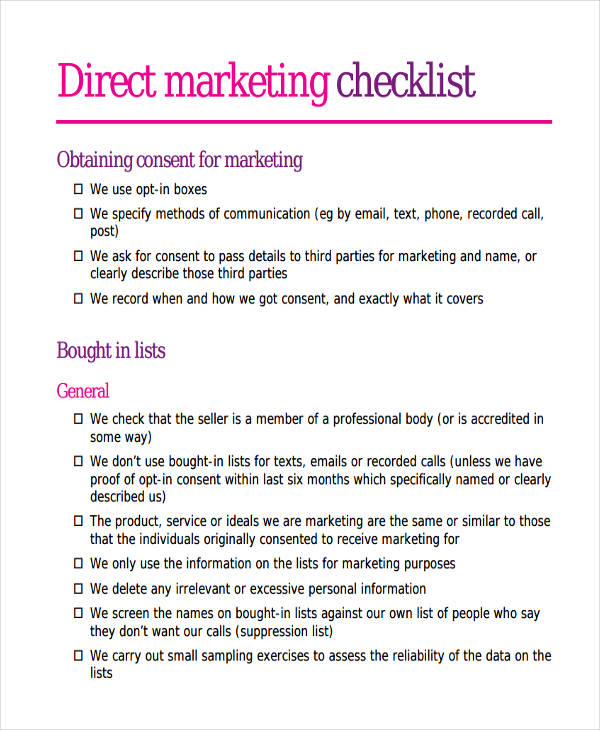
Direct Marketing
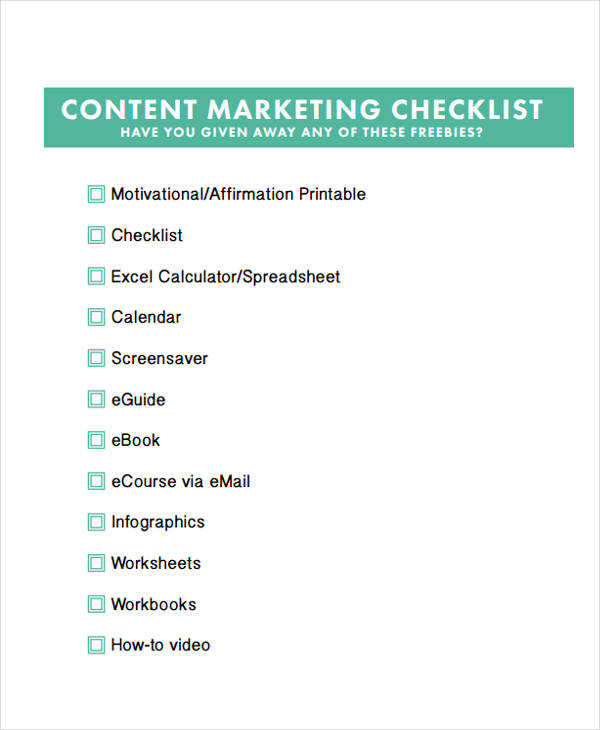
Content Marketing
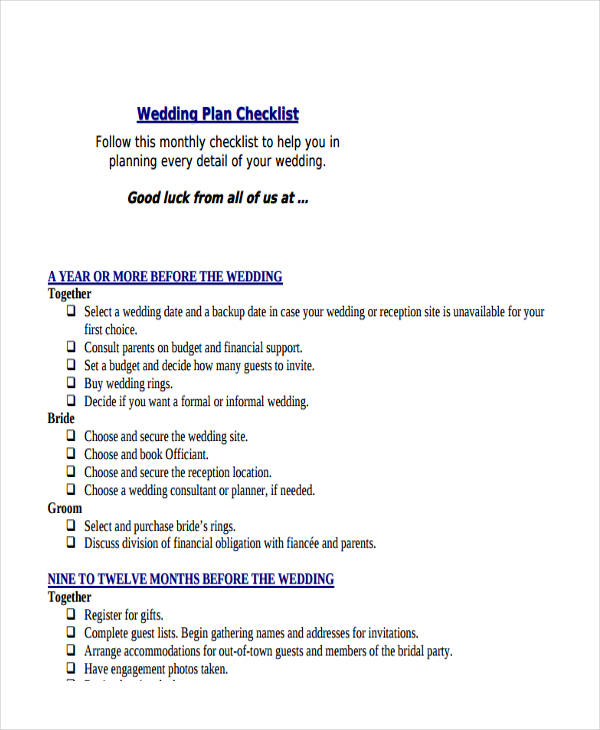
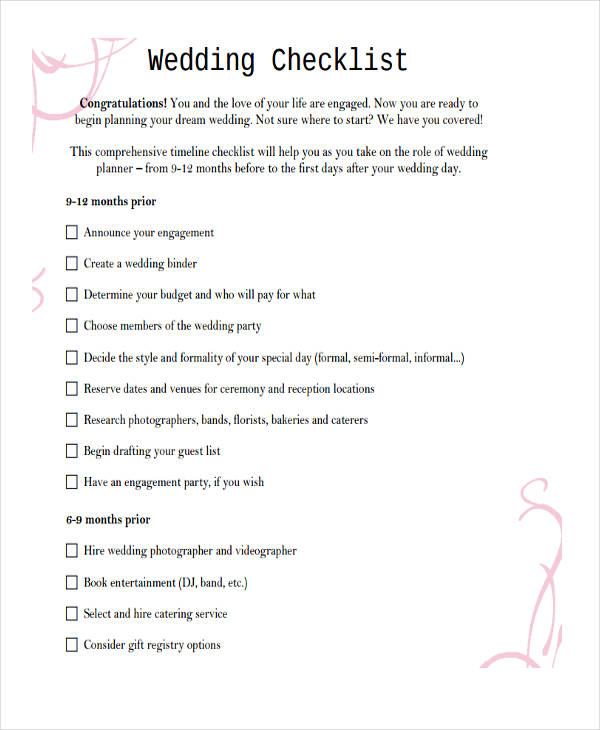
Wedding Checklist
Wedding Planning
Printable Wedding
The Dos and Don’ts in a Form of a Checklist
Part of being a human, we always forget. Most specially when we get old, forgetting things in an instant is one sign of aging.So how can we remember the things that should be kept inside our minds? I know that the longer the list in our minds are, the more stuff we forget.
Looking at a long paragraph about what you should do or not would only be confusing and stressful.
The beauty of a wedding checklist is that it can be for several purposes. It can be used in an investigation such as safety checklists in a building for fire emergencies and behavioral checklists for a student in a school.
- Checklists can also cover the Dos and Don’ts. This can be relating to the safety responses that a person can do.
- Checklist can also be part of an emergency plan, wherein employees or other people in a facility can use as a guide.
- Checklist can list all of the dos in the left side and the don’ts in the right side. With that, people would easily see what stuff to remember and not take days to read a long essay.